
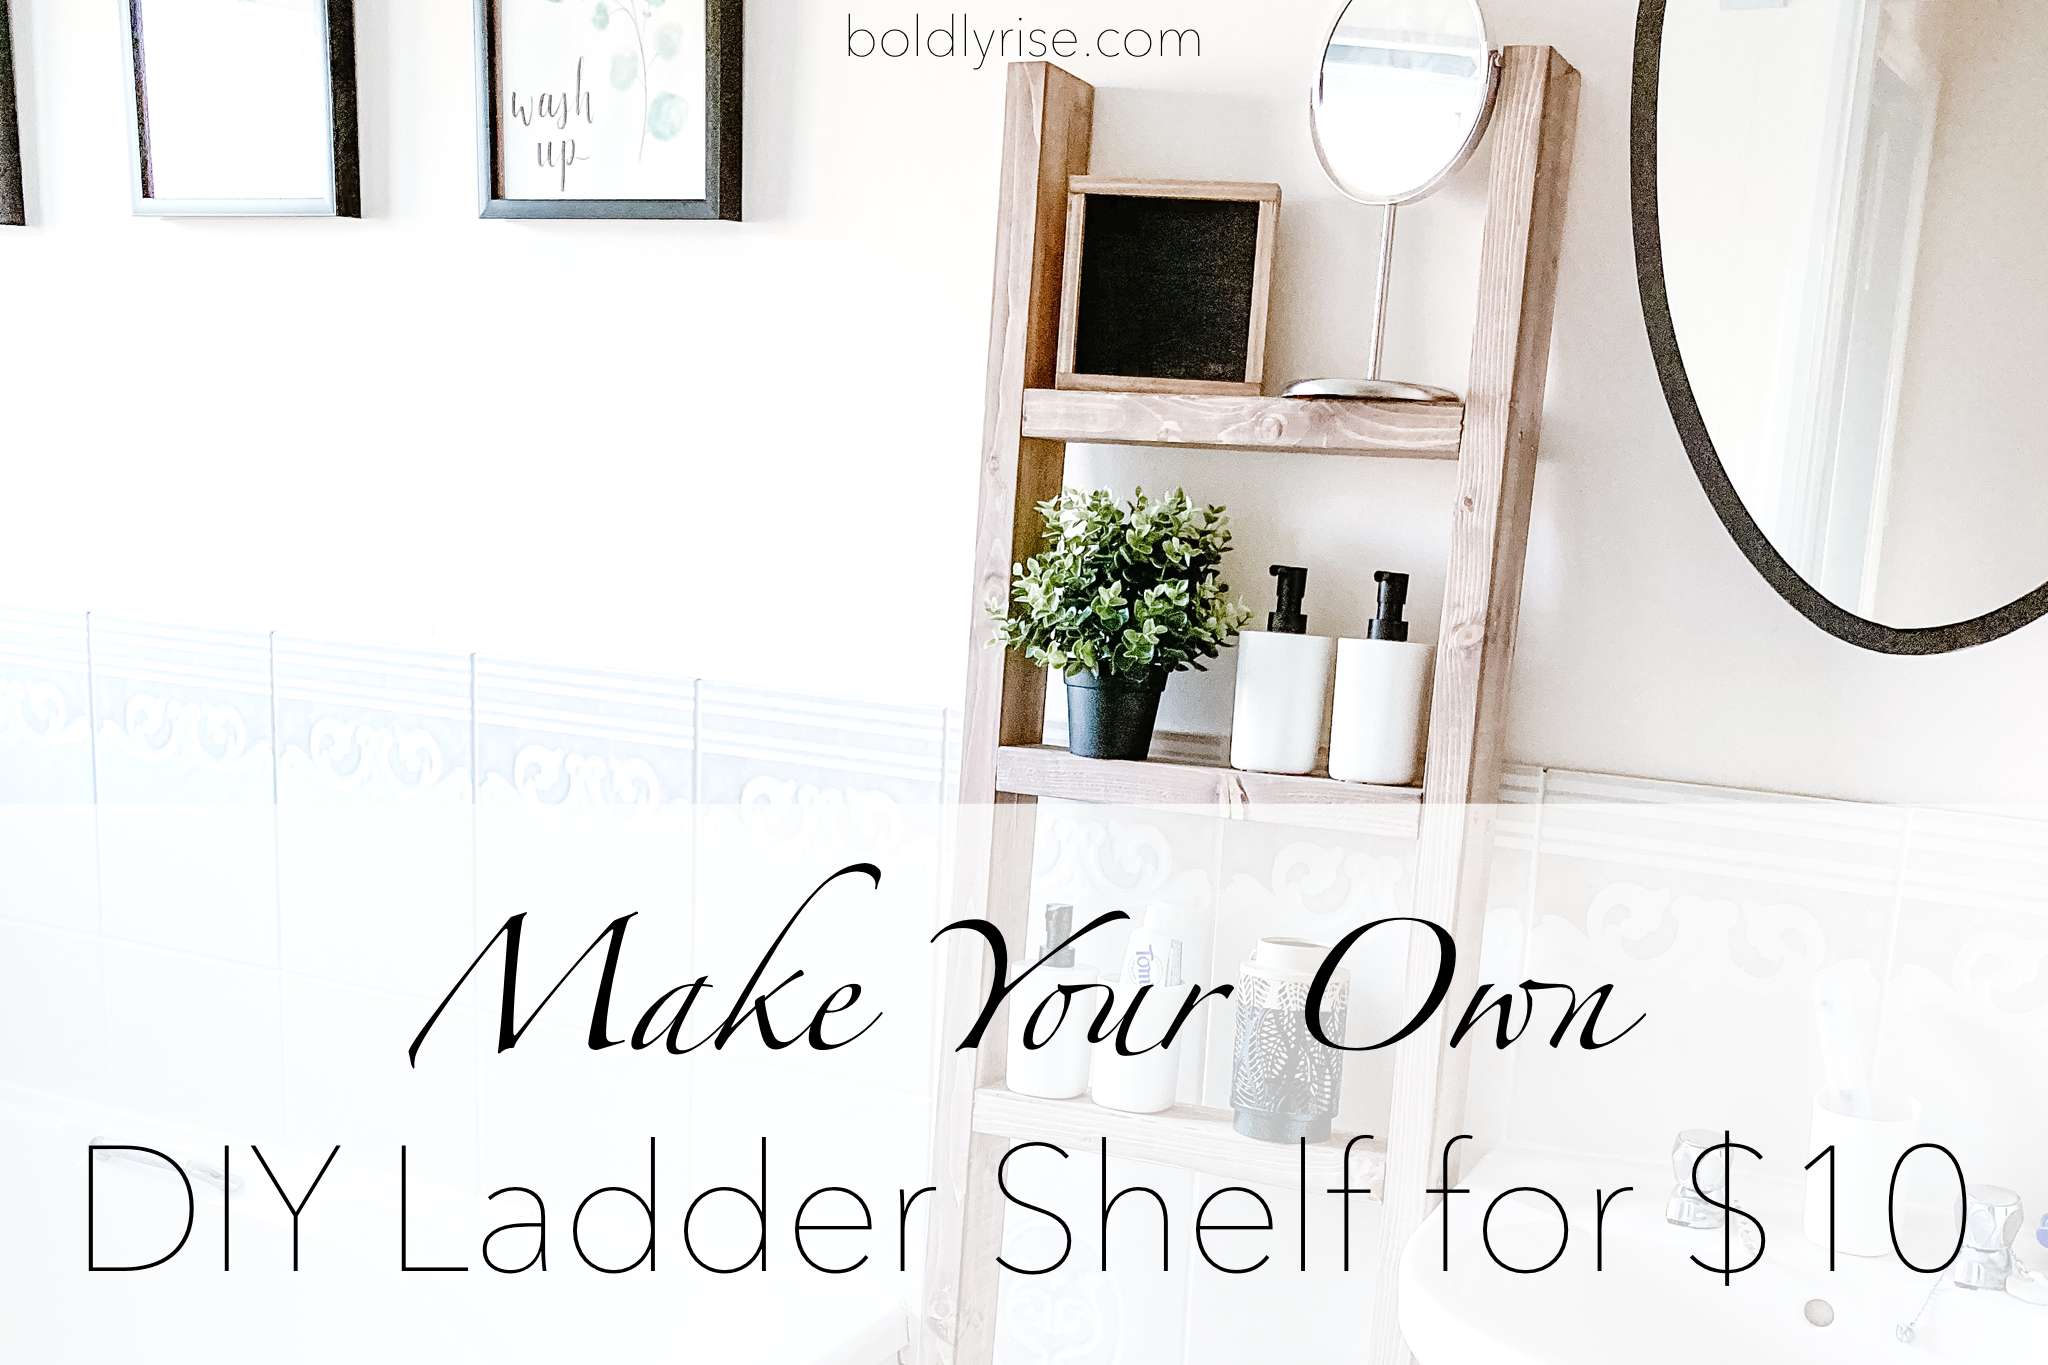
There’s nothing better than finishing a FUNctional (too cheesy?) DIY project for around $10! This easy $10 DIY ladder shelf was exactly what we needed for our guest bathroom.
Why?
Our house has very little storage. The bathrooms are no exception. Our guest bathroom’s pedestal sink leaves enough room for a couple hand soaps, but that’s it. There’s very little space to set anything down. And when we are finally able to have guests stay over, I want them to have some place to set their items on.
I spotted a similar looking shelf on Instagram and knew that this project needed to happen. I’ve built a blanket ladder before (click here for the full tutorial on that), so I was confident that I could make this ladder shelf.
And I’m confident you can too! Just follow this simple process below.
DIY Ladder Shelf
Let’s start with supplies. You’ll need:
2×4 wood
Sand paper (60, 120, 220 grit)
Stain/Paint (optional)
Stain/Paint brush
Paper towels (if staining)
Wood glue/super glue
3in long screws
And tools…
Saw (I recommend using a miter saw)
Clamps
Drill
Step 1: Buy your wood (and other supplies)
Depending on how tall and how wide you want your ladder shelf depends on how much wood to buy. I was able to buy 2 – 8ft long 2×4’s. The sides/legs of the shelf are 65” long and the shelf pieces are 14.5” wide (I had limited space in-between the sink and bathtub, but wanted to use a good portion of it).
Step 2: Sand away
After buying your wood (MILITARY FAMILIES: YOU GET A 10% DISCOUNT AT LOWES), you’ll need to sand them down. The reason I sand first before I cut the wood is to limit the amount of splinters I get. But you can switch the cutting and sanding steps around if you want. Start with 60 or 80 grit sand paper. Then use 120 and finally 220. DO NOT skip the grit sizes. The 120 helps to soften the 60 or 80 and get rid of those rough lines, something the 220 will not do. And the 220 softens and gets rid of the 120 lines. It feels so good after sanding!
Step 3: Using your saw, cut them into the sizes you want
Next, cut them into the sizes you have in mind. I would recommend using a miter saw for this project, however any saw will do. I personally used a jig saw for this project to see if a jig saw could cut through this type of wood… and it did! However, I don’t recommend using a jig saw for this project. I am limited in what power tools I can use right now (because we’re living overseas), and this is what I had to work with.

Step 4: Stain, paint, or leave as is
I chose to stain my ladder shelf. I used wood dye (it’s a little different then stain) in American Walnut. Walnut or dark walnut are my go-to choices for staining wood. However, paint will work just as well! Or if you are wanting to leave it as is, that’s great too! Follow the directions on your stain/paint can to know how to best apply it to your wood.
Step 5: Glue it, clamp it, let it dry
I highly recommend using Dap RapidFuse for the wood glue. It’s the best I’ve used so far. However, any wood glue (or even super glue) will work. Glue your pieces in place. I placed each shelf 10” apart from each other. Use clamps to hold them in place until they dry. Gluing first helps to make your project more solid, but it also helps when it comes time to place the screws. The glue keeps the wood from moving around while you’re trying to screw them in place.
If you don’t have clamps, that’s okay! They really really help, but you can still do this project without them. With the Dap RapidFuse glue, just push the wood pieces together as tight as you can for about 60 seconds. This glue sets in 30 minutes. The clamps will help set it correctly, but for the purpose of this project, the glue helps set the wood in place before you place the screws in. As long as the wood pieces set well enough for you to screw the screws in without the wood moving, then you’ll be just fine.

PRO TIP: Use a piece of chalk to mark the lines where you want your pieces to be.

Step 6: Grab your drill and screws
Place 2 screws on each side of each shelf piece going in from the wood sides/legs. Here’s a picture to help explain it better:

_____________
And that’s it! This is a simple project, even for a first time DIYer. I already had a lot of the supplies needed for this DIY ladder shelf (sand paper, screws, stain, etc.), so it lowered the cost of this project for me. Outright, I only had to buy the wood. But figuring out the cost of the supplies, I only spent around $10 for this project. Even if you have to buy all the supplies outright for this DIY ladder shelf, you’ll already have most everything you need for your next diy project (and that’s one reason I love DIY’s, they save so much money!).
If you’re looking for some items to decorate your DIY ladder shelf, why not shop at my new online shop Summit and Soar Prints? It’s the perfect addition to your ladder shelf decor – and you can have it on your shelf today!
For other DIY or decor help, tutorials, or ideas, head to the Home Decor and DIY’s tab under Around the Home on my blog!

Pin these pictures and share with your friends!

