
Okay, so I had originally planned on doing a YouTube video about how I made my white pallet board background… but the Lord had other plans for this. Somehow along the way, the videos got deleted. Except for one! Despite this, I am determined to do my best to show you step by step how to make this DIY white pallet board background to use in the background of pictures whether for blogging or for social media.
Items Needed For This Project

+Wood boards in whatever length you want (I used pallet boards)
+Sand paper (and preferably a sander)
+Hammer
+Nails
+White paint (see picture below for the type of paint I used… it worked really well)
+Paint brush
+Paper Towels

As far as the boards that I used, I used pallet boards that I bought from someone at the Marketplace on Facebook. It’s a cheap way to get a hold of some good wood. I got 15 boards for about $10. That’s a lot cheaper than if you go to Lowe’s or Home Depot or a similar store. So check out your area on Facebook Marketplace to see if someone is selling some good boards for super cheap.
I used 13 boards for the front and then 2 support boards in the back to nail the 13 boards to.


Step 1: Sanding
Depending on the type of wood you bought, you will need to sand everything first. If you’re using pallet boards like I did, you’ll definitely want to sand them.
Start by sanding with 80 grit sandpaper. If you want to make the boards extremely smooth, then use 120 or 160 grit next. However, I went straight to the 220 grit sandpaper (which is usually a huge ‘NO’ in the woodworking community….). Because I wanted it to retain some of it’s rustic qualities, I didn’t mind if the sanding wasn’t perfect or even. The goal here was just to make sure that I wouldn’t get splinters when I handle the wood.
This is the longest part of the project. To make it go a little faster, you can use a sander. I use a Bosch random orbital sander. It makes the process go so much faster, and my arms and hands don’t get tired by the third board. But if you don’t have an electric sander, it’s totally doable to do this step by hand.
Step 2: Organize and Layout Your Boards
Once you’ve finished sanding, then find a large area where you can lay down the boards in the order you want them to be. This is when you want to organize how you want your boards to look. As you lay them next to each other, flip them around to see which side you want facing the front, which sides you want hidden in the back, and which boards you want up top or down low. Move the boards around until you are happy with how they look next to each other. Some of my boards had some writing on it that I didn’t want showing in the front, so those were faced towards the back where no one would see. I also like having some of the natural knots in the wood facing forward to give it that rustic look to it. If some of your boards are little warped, that’s okay! I had some like that too. It gives it a little extra charm.
Step 3: Flip them over
Now that you have them laid out in the order you want, you’re going to flip the boards over so you can start nailing the 2 support pieces on the back.
Step 4: Pull out your hammer and nails
Place the 2 support pieces on the back but perpendicular to the front pieces of wood. You want to place them at least half a foot from the edges to ensure more stability. My two pieces are a little long, but it doesn’t bother me.

Pull out your hammer and nails and start nailing the support pieces to each piece of wood. You want to make sure to get the right sized nails so that they don’t go through the other side. I used 1.25 inch nails and those worked well for the width of my wood. But it may be different for you depending on how thick your wood is.
Nail two nails per piece of wood on each support piece. See the picture below for a reference.

To add extra stability and support, and to really make sure that none of the pallet boards come off the support pieces, I nailed both sides…. Like this…

Because I was going for a true rustic look, I’m okay with the nails showing. However, if you don’t want the nails to show, you can use what’s called a “nail punch” to push the nails in further past the surface (you can find them for a few dollars in the tool section of almost any store). Then you can use some wood filler and fill the holes. When you paint over it, you won’t notice the nail holes. But this is totally up to you!
Step 5: Painting
Here’s the fun part (at least for me)! When you have everything nailed together, it’s time to paint the front. To get this rustic, sort of see through layer of paint, you’ll need paper towels. So first, you’ll dip your paint brush in the paint and spread a layer of paint over one or two boards, depending on how fast your paint will dry. Then take some paper towels (you could even use some old clothes that you don’t mind getting paint on) and wipe off all the wet and excess paint.
To make it so that you still see some of the natural wood underneath, don’t put a lot of paint on your paint brush. You don’t have to cover the entire board with paint if you want some of the natural wood to stand out. When your paint brush is sliding along the board and starts running out of paint, that’s a good thing (if you’re wanting some of the natural wood to show). Play around with it. The beautiful thing about this DIY is that you can’t go wrong with the paint and it doesn’t have to look uniform.
Step 6: Let It Dry
It shouldn’t take long for the paint to dry, especially if you used the paper towels to create a see through layer of paint. But you want to let the paint dry before we move on to the next step.
Step 7: Spot Sanding
Here’s what I mean by spot sanding. To make it look even more rustic than it already does, take some 220 grit sandpaper and slightly sand some lines here and there. This will take off some of the paint and give it that rustic feel, that used feel. Below are some examples of some of the spot sanding that I did.


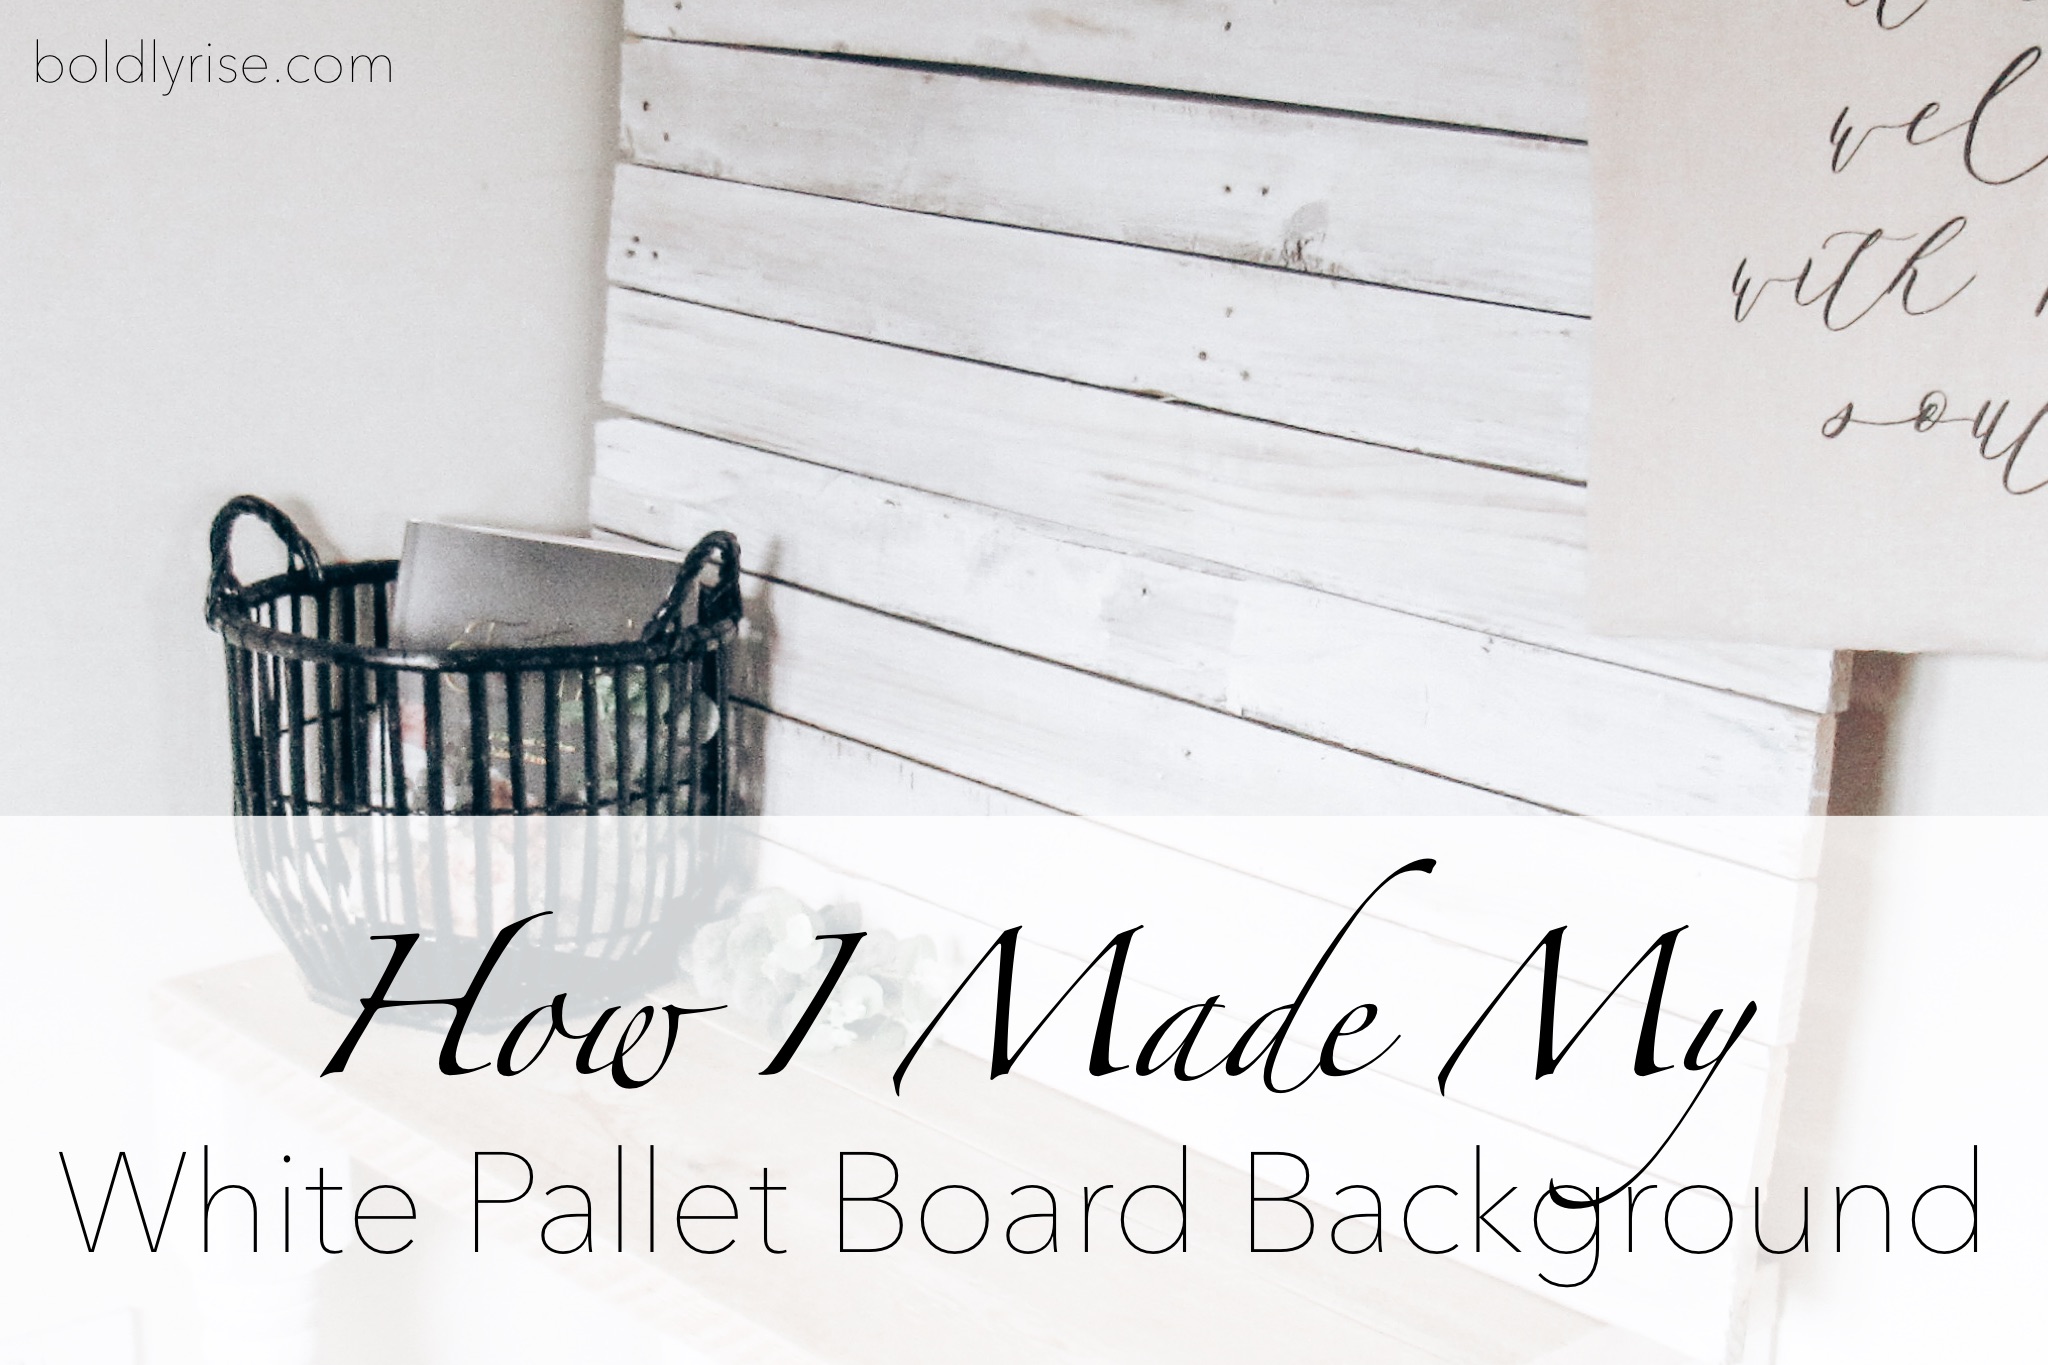
Here is the final product!

_____________
And that’s it! This is a pretty simple project and oh so cheap:) I will show you a picture of it all set up. I set it up on my desk and leaned it against the wall. It’s heavy enough that it won’t fall over. If you want, I don’t see why you wouldn’t be able to hang it up. You would just need some heavy duty wall hangings. If you are wanting to cover a wall using the steps in this DIY, then I wouldn’t use the 2 back supporting pieces, I’d nail them (using a brad nail gun) to fix them directly on the wall.


Let me know how your project turns out. If you have any questions, drop them in the comments below and I will be sure to answer them:)
_____________
Pin these pictures and share with your friends!

